Thinking about upgrading your kitchen and want to save some serious cash? Learning how to build kitchen cabinets like a pro might sound intimidating, but it’s a totally achievable DIY project—even for non-professionals. With the right tools, planning, and guidance, you can build cabinets that look amazing, function well, and last for years.
This guide walks you through the entire process in a clear, beginner-friendly way. Whether you’re outfitting an entire kitchen or just want a few custom cabinets, this post will help you build with confidence.
Why Build Your Own Kitchen Cabinets?
Before diving into the steps, let’s answer the big question: Why build kitchen cabinets yourself?
Here are a few compelling reasons:
- Save money: Custom cabinetry is expensive. Building your own can cut the cost by more than half.
- Custom fit: You can tailor every cabinet to your kitchen’s layout and storage needs.
- Skill building: It’s a great way to sharpen your woodworking and DIY skills.
- Satisfaction: There’s nothing quite like enjoying a kitchen you built yourself.
What Tools Do You Need to Build Kitchen Cabinets?

You don’t need a professional-grade workshop, but having reliable tools can make your project a lot easier and more precise. Here’s a more detailed breakdown of what you’ll need:
Essential Tools
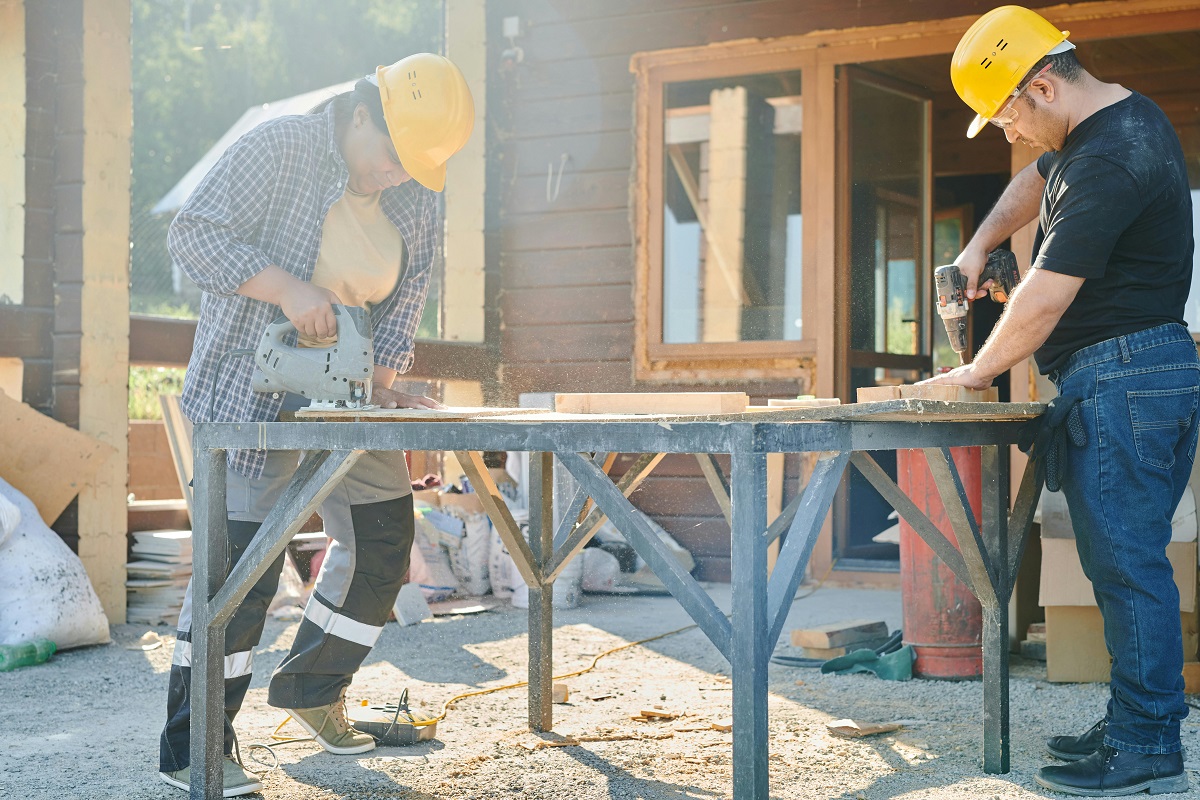
- Table saw or circular saw (with guide rail): For straight, accurate cuts in plywood and hardwood.
- Drill and impact driver: To pre-drill holes and drive screws efficiently.
- Clamps: To hold pieces steady during gluing and fastening. Bar clamps and corner clamps are especially useful.
- Tape measure and speed square: To ensure accurate measuring and square corners.
- Level: To make sure cabinets sit straight and even.
- Pocket hole jig: Essential for creating strong joints quickly, especially useful for beginners.
- Wood glue: Adds holding strength along with screws.
- Sandpaper or electric sander: For smoothing surfaces and preparing for finishing.
Optional but Helpful Tools
- Brad nailer or finish nailer: Speeds up the process of attaching panels and face frames.
- Router with edge bit: Cleans up plywood edges and adds professional detailing.
- Cabinet hardware jig: Helps you drill perfect holes for handles and drawer pulls with consistent placement.
- Workbench or sawhorses: A stable work surface can improve accuracy and safety.
If you’re just getting started with woodworking, consider renting some of the more expensive tools or borrowing from a local tool library.
What Materials Should You Use?
Choosing the right materials can make or break your cabinet build. Think about durability, finish, and cost before purchasing.
Plywood
- Best all-around material for cabinet boxes.
- Choose 3/4″ plywood for sides, top, and bottom panels.
- Use 1/4″ or 1/2″ plywood for back panels.
- Look for cabinet-grade plywood with minimal voids and a smooth surface.
MDF (Medium-Density Fiberboard)
- Ideal for painted surfaces due to its smooth finish.
- Great for slab doors and interior panels.
- Drawbacks: Heavier than plywood and not moisture-resistant—avoid using it in sink base cabinets.
Solid Wood
- Typically used for face frames, drawer fronts, and door frames.
- Gives a high-end appearance and can be stained beautifully.
- Use hardwoods like maple, oak, or poplar for durability.
Other Materials
- Edge banding: For finishing exposed plywood edges if you’re skipping face frames.
- Screws, nails, and wood filler: Have extras on hand to correct any assembly or surface errors.
Pro tip: When buying wood, inspect each sheet or board. Avoid warped, cracked, or water-damaged stock. If your store offers panel cutting, have them cut oversized pieces to save time and effort.
Step-by-Step: How to Build Kitchen Cabinets
Let’s break down the process into manageable steps.
1. Measure Your Space
Start by measuring the space where your cabinets will go. This includes:
- Ceiling height (for upper cabinet placement)
- Wall width and corner clearance
- Dimensions and location of appliances
- Preferred cabinet height (usually 34.5″ for base, 18″ clearance between base and wall cabinets)
Take note of any plumbing, electrical, or ventilation features you’ll need to work around. Write down all your measurements clearly and double-check before cutting anything.
2. Plan Your Cabinet Layout
Sketch your layout on paper or use free online kitchen design tools. Consider:
- Cabinet types: Base cabinets, wall cabinets, pantry units, corner cabinets
- Storage preferences: More drawers or more shelves? Pull-out trays?
- Appliance integration: Leave space for stove, fridge, dishwasher, etc.
- Door/drawer function: Do you want full overlay, partial overlay, or inset doors?
Group similar cabinet types to streamline your build process. Standard base cabinets are 24″ deep and 34.5″ tall; wall cabinets are 12″ deep and vary in height.
3. Cut Your Cabinet Parts
After finalizing your cut list, begin cutting your materials to size. Label each part for easy tracking. Use your saw to make:
- Two side panels per cabinet
- Top and bottom stretchers (horizontal supports)
- Back panel (typically recessed)
- Toe kick (4″ tall cutout or separate frame at the base)
Use a sharp blade for clean cuts and consider a sacrificial backing board to reduce tear-out. Apply edge banding to exposed edges as needed.
4. Drill Pocket Holes and Assemble the Box
Use your pocket hole jig to pre-drill joinery holes in the top, bottom, and back edges. Dry fit pieces before applying glue.
- Start by attaching the stretchers between the two side panels.
- Add the back panel, ensuring it’s square.
- Clamp securely while screwing the joints together.
Reinforce joints with glue and corner blocks if desired.
5. Install the Back Panel
Cut the back panel to fit inside the cabinet box. Attach it using brad nails, finish nails, or screws. For additional strength:
- Use glue along the edge before securing.
- Add corner braces inside to stiffen the structure.
- Check for squareness before final fastening.
6. Add the Face Frame (Optional)
A face frame adds structure and traditional style. Build it separately with:
- Vertical stiles (same height as cabinet)
- Horizontal rails (matching cabinet width)
Attach the frame using pocket screws and wood glue. Once set, clamp the frame in place and screw it into the cabinet box. Sand all joints flush.
If you’re aiming for a timeless look—like Shaker or Mission-style cabinets—a face frame is essential. These designs rely on strong, clean lines and recessed panels that work best with a framed structure.
If you prefer a modern look, skip the face frame and apply edge banding to all visible plywood edges for a clean, minimalist style.
Finishing Touches: Sanding, Painting, and Installing

This final stage is where your work really shines—or doesn’t. Don’t rush the finish. Clean lines and a smooth surface make your DIY cabinets look like they came straight from a showroom.
Sand Everything Smooth
Start with 120-grit sandpaper and work up to 220. Use a sanding block or orbital sander for large surfaces and hand-sand the edges.
Checklist:
- Sand cabinet faces, sides, and all visible parts.
- Lightly round sharp edges.
- Remove dust with a tack cloth or vacuum before finishing.
Pro Tip: A quick wipe with a damp cloth will also raise the grain—sand lightly again after it dries for an ultra-smooth finish.
Paint or Stain
Pick your finish based on your cabinet material and kitchen style.
Painting:
- Prime bare wood or MDF first to prevent blotchiness.
- Use cabinet-grade latex or alkyd enamel.
- Apply two thin coats using a foam roller or sprayer for a brush-free finish.
Staining:
- Choose a wood species that takes stain well (like maple or birch).
- Apply with a cloth or brush, wipe off excess, and let dry completely.
- Seal with a polyurethane topcoat.
Pro Tip: Avoid painting on humid days—moisture affects both drying time and smoothness.
Attach Doors and Drawers
Time to bring everything together.
- Use Euro-style concealed hinges for clean lines and adjustability.
- Install drawer fronts flush with the cabinet box. Use temporary double-sided tape to hold them in place, then secure from the inside.
- Use a hardware jig to drill holes for knobs or pulls—it saves time and keeps everything even.
Pro Tip: Start with the upper doors and work your way down. It helps avoid bumps and makes alignment easier.
Install Cabinets in the Kitchen
Installing cabinets is all about being level, square, and secure.
Steps:
- Locate Wall Studs and mark them along the install area.
- Start with Upper Cabinets: They’re lighter and easier to hang without base cabinets in the way.
- Use a Ledger Board to temporarily hold wall cabinets in position while you screw them in.
- Level and Shim Base Cabinets to adjust for uneven floors.
- Screw Boxes Together through the face frames or sides.
- Secure to Wall Studs through the cabinet’s back rail using 2½” screws.
- Anchor Base Cabinets to the floor if required by local codes or flooring types.
Pro Tip: Clamp adjoining cabinets together before screwing them for a seamless look.
Common Mistakes to Avoid
Even skilled DIYers make mistakes—but here’s how to dodge the most common pitfalls:
- Rushing Measurements: Don’t eyeball it. Measure twice—cut once. Account for hardware spacing and clearance.
- Skipping Sanding: That “just a little rough” patch? It’ll show up under paint like a spotlight. Smooth it out now.
- Using the Wrong Hardware: Cheap slides and hinges cause sagging, misalignment, and drawer sticking. Go for soft-close or heavy-duty versions.
- Not Leveling During Install: Cabinets that aren’t perfectly level will mess with your countertop, backsplash, and appliance fit. Use shims liberally and a long level often.
Pro Tip: Make a checklist of cabinet locations and hardware to double-check before installation day.
How Long Does It Take to Build Kitchen Cabinets?
Building kitchen cabinets is time-intensive but doable. Here’s a rough timeline:
- Planning and measuring: 1–2 days
- Cutting and assembling: 3–5 days (depending on number of cabinets)
- Doors and drawers: 2–3 days
- Finishing and painting: 2–4 days (with drying time)
- Installation: 1–2 days
Total: Around 2 weeks of part-time work
Final Tips to Build Kitchen Cabinets Like a Pro
- Label all your parts to keep track during assembly.
- Practice on scrap wood before cutting your actual pieces.
- Work in batches (cut all sides first, then all backs, etc.) to streamline the process.
- Use good lighting when working to avoid mistakes.
Remember: building kitchen cabinets is not about perfection—it’s about precision, patience, and persistence.
Ready to Build Your Dream Kitchen?
Now that you know how to build kitchen cabinets like a pro—even if you’re not one—you’re ready to tackle one of the most satisfying home improvement projects out there. From custom sizes to personalized finishes, DIY cabinets give you total control over your kitchen design.
Grab your tools, take your time, and enjoy the process. You’ve got this.


