
Easy DIY outdoor projects can be a lot of fun and rewarding. These projects don’t require the skills or expertise that other types of home repair jobs might, so they are perfect for the do-it-yourselfer on any level. If you’re considering easy DIY outdoor projects to tackle, here are 7 options to consider!
Fix a Leaky Faucet

Exterior faucets are usually helpful, especially when attaching a hose for the exterior water supply. If you see water leaking from the hose bib, it is probably time to replace the washer. You can purchase a rubber or metal washer at your local hardware store for less than $0.50 each and they are easy to install with just an adjustable wrench.
Turn off the water to your hose bib first (the handle should be located on or near one of the valves) and then loosen the screw that holds it in place with an adjustable wrench. Remove the old washer, insert a new one, tighten firmly and turn back on the water. The leak is now resolved! If you need to access the water from your outdoor faucet, this is an easy DIY outdoor project you can handle.
Repair Cracked Walls or Siding
Cracked sidings are not only aesthetically unappealing, they can also crack, further exposing your walls to the elements. You can usually find the type of siding that you need at your local hardware store. If you don’t know if it is aluminum, vinyl, or something else (or what size), stop in and they will be able to determine which material and cut it for free! Once purchased, simply remove any nails from the broken boards (if they are attached), use a pry bar to remove the nails in the siding, then replace them with a new board. You can also get the help of your local siding contractors.
Although cracks sometimes indicate some deeper underlying problems in the building, sometimes they are just mild and only need a little repair. To repair a cracked wall, you will need to first cover the area with heavy-duty painter’s tape. Pressure washing should help you clean the crack before filling them with an appropriate compound like spackle. Let it dry for about 30 minutes. Scrape off excess material using sandpaper (scraping horizontally as you go) and then sand the patch with fine-grit sandpaper. Apply a thin coat of primer, let dry for 30 minutes. Your residential contractor should be able to advise you on the best primer and paints to purchase.
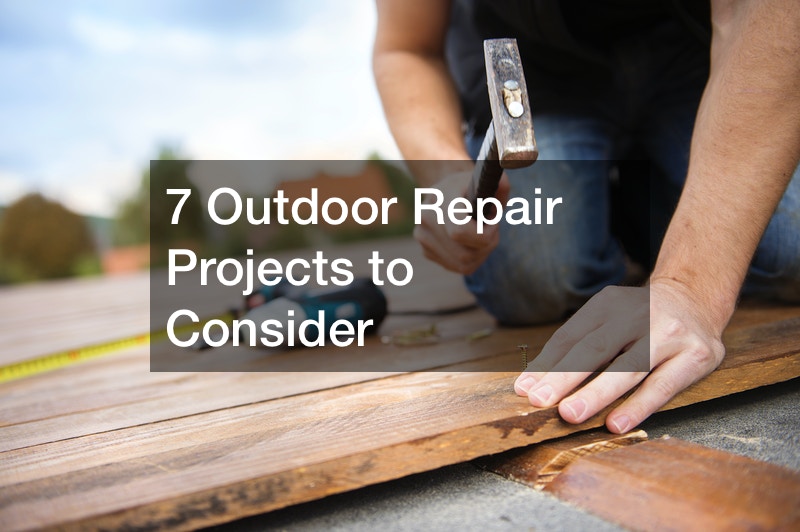
Fix Drywall Problems

Drywall is the most common building material used in home construction and remodeling because it’s lightweight but sturdy, affordable, easy to work with, water-resistant, and ready for paint or wallpaper. When drywall starts showing signs of wear, chips out of corners, bubbling or peeling paint, water damage, it’s time to repair the damage yourself. Here is a step-by-step on how to repair a drywall problem.
Start by covering the area with a layer of painter’s tape to protect it from any overspray. Use an electric sander and coarse sandpaper (60 or 80 grit) to remove all paint, plaster, or wallpaper that was damaged beyond repair using horizontal strokes; then use finer sandpaper if necessary.
Fix any holes by hanging pieces of drywall tape over the hole, spreading a thin layer of compound on both sides, and smoothing it out with your hands. Use a damp cloth to wipe away excess material from around the edges. Let dry for 30 minutes before sanding down patches with coarse sandpaper or electric sander.
Fix a Leaking Roof by Replacing Shingles or Tiles
If you have an old roof that is leaking, it could be due to worn shingles. Replacement of shingles will make your home’s exterior look newer and contribute to curb appeal as well. In order to complete this project safely, it’s best to use a ladder and have someone’s help.
Check for water damage by looking under the roof of your home. If there is any evidence of mold or mildew, it will need to be remediated before shingles can be replaced. Shingle replacement starts at about $800 whereas tile replacement averages around $900. DIY roof repair will save you some bucks.
If you have a metal roof, it may need to be resealed and inspected for leaks prior to replacement. There are special products designed specifically for this type of application, but homeowners can also use latex paint or silicone sealant that will work as well. Again, make sure there is no evidence of mold or mildew before attempting to reseal the metal roof. However, it would be much better if gutters contractors handled it.
Replace a Damaged Window Pane

First, remove the old putty from around the frame. Use a scraper if necessary and then clean off any dust or debris with a vacuum cleaner to prepare for the new sealer. Once dry, take your replacement window pane (which should have been pre-cut by someone at the store) and apply the putty to both sides of the frame.
Use a caulking gun for this part, to keep everything in place while you push it together using your fingers or thumbs. If there is any excess material on top of a windowpane, remove it with a razor blade before it dries, because once that happens, it will have to be sanded off. Once done, you can complete the process by painting your preferred color on top of the frame.
Install an Outdoor Fence
An outdoor fence is a great addition to any home’s exterior, can function as an extension of your property line, and boosts security since it keeps unauthorized persons from trespassing.
You should stump grinding where the fence passes near tree stumps. Also, posts should get a pest management service to increase longevity. The materials needed for this project include cedar or pine boards, fencing posts that are at least 36′ tall with copper wire attached on top (or another material if you prefer), galvanized steel posts, fencing wire, and outdoor paint (depending on the material you use).
Install concrete posts at least 36′ deep and attach them with metal wiring. It’s also a good idea to have stakes of some sort nearby in case there is any wind or heavy rain that could potentially knock over your fence. Next, cut them to size and attach them with galvanized wire or wood screws. Paint the posts and boards so they are weather-resistant if you live in an area that has harsh winters like North Dakota and Minnesota.
The fence alone cannot complete home security without the gate to exact control on who comes into your home. Metal fence gates look great on any home’s exterior and can be installed in a variety of different styles: from simple sliding metal gate poles, hydraulic pole systems, or even electric motorized models.
The materials needed for installation include some pre-cut wood boards (usually at least 36′ tall), metal fence posts, and a gate kit that includes everything needed to make it operational.
The installation process starts by using stakes or other heavy objects to secure the wood boards in place on each side of the opening where you will install your new gate. Use wiring if necessary for added security, but be aware this will create an unsightly appearance.
Next, erect the metal posts in place and attach them to your wood boards with screws or a few bolts. Attach the gates at this point if you are installing those as well; otherwise, it is time to paint or seal all these pieces, so they will last for years.
Repair a Drafty Window

If you have ever walked into your home and been hit by the cold air on an especially chilly day, then chances are you need to repair or replace one of your windows. This is something that can be done by any do-it-yourself fan! There are many different kinds available for purchase and they all come with easy-to-follow instructions.
First, measure the window and determine what size you need to purchase. Purchase a new sealant (if necessary) for your window from an appliance or hardware store. Install this on all the cracks in the areas where there are gaps between your panes of glass that allow cold air into your home; these spaces can be found on the top, bottom, and sides of your window.
Use a putty knife to apply sealant in an ‘X’ formation so that it is evenly distributed over all the gaps before wiping it off with a cloth or paper towel; take care not to use too much as this can cause more problems than it solves! Let it dry for at least 24 hours before putting it back in place.
Repair Brick Patio
Probably, your brick patio has seen better days, and you might want to repair or replace it altogether with concrete pavers instead. This can be a time-consuming and expensive project but is worth the investment if you live in an area that gets a lot of rain or snow.
The first step is to remove any plants and mulch from the brick patio before removing any layers of dirt; this will allow you to see what needs to be done better. Next, break up all large pieces with a pickaxe or shovel into smaller chunks which are easier for removal.
Once this is done, remove the dirt in layers. Use your hands to get all of it up, then wipe it off with a rag or paper towel before moving on to another layer below; be sure not to leave any debris behind, as this will only cause more problems down the road! Add new soil or sand as needed to the top layer and install a new brick patio. This project is one of the fun and easy diy outdoor projects.
Adjust Water Temperature Setting
Installing outdoor hot tubs, an idea drawn from luxury hotels and spas is becoming a thing. If you have one in your backyard, then you know that temperature settings can misbehave once in a while. Here is how to fix temperature settings in your outdoor bathtub.
If you are experiencing problems with the hot or cold water in your home being too high or low
Start by removing the handle from your bathtub faucet with a screwdriver and use needle-nose pliers to unscrew it. Once this is done, remove the nut that attaches the stem (that is connected to your hot water) by turning it counterclockwise; take care not to damage any parts in the process.
Attach the replacement stem to your faucet with a new nut (you may need assistance) and use pliers if necessary. Be sure to tighten it enough so that there is no water leaking from either side of the fixture; you can always adjust this later on as needed once everything has been properly installed.
Finally, reattach the handle to your faucet and turn it on for a few seconds until you hear it running correctly.
Garden Repairs
Gardening is not all about tree shaping. Who said that your garden path has to be muddy and messy during the wet season? Taking a few hours off on your weekend and laying down equipment is all it takes to alleviate the situation. Mulch is commonly available and more economical than other route laying materials. Bluestone, brick, and gravel are much better but also expensive. You can also enlist the help of ants control services since ants can be a bother.
Laying a garden path is a no-brainer. You only get the material and spread it evenly over the path. You can also create a new edging using stone, wine bottles, metal, and even bricks. Mulch, however, provides a breeding ground for rodents. Thus, you might need a rodent control service.
Bottom Line
You don’t have to get the help of an expensive professional for all outdoor projects. With a little time to spare and the right materials, easy DIY outdoor projects are a useful way to pass time. Most of these materials are available at your local repair stores, some of which offer impressive discounts. Outdoor repair projects are just the right thing for DIY guys to show their creativity and new skills learned. Whenever stuck, feel free to ask an expert.