
Highlights:
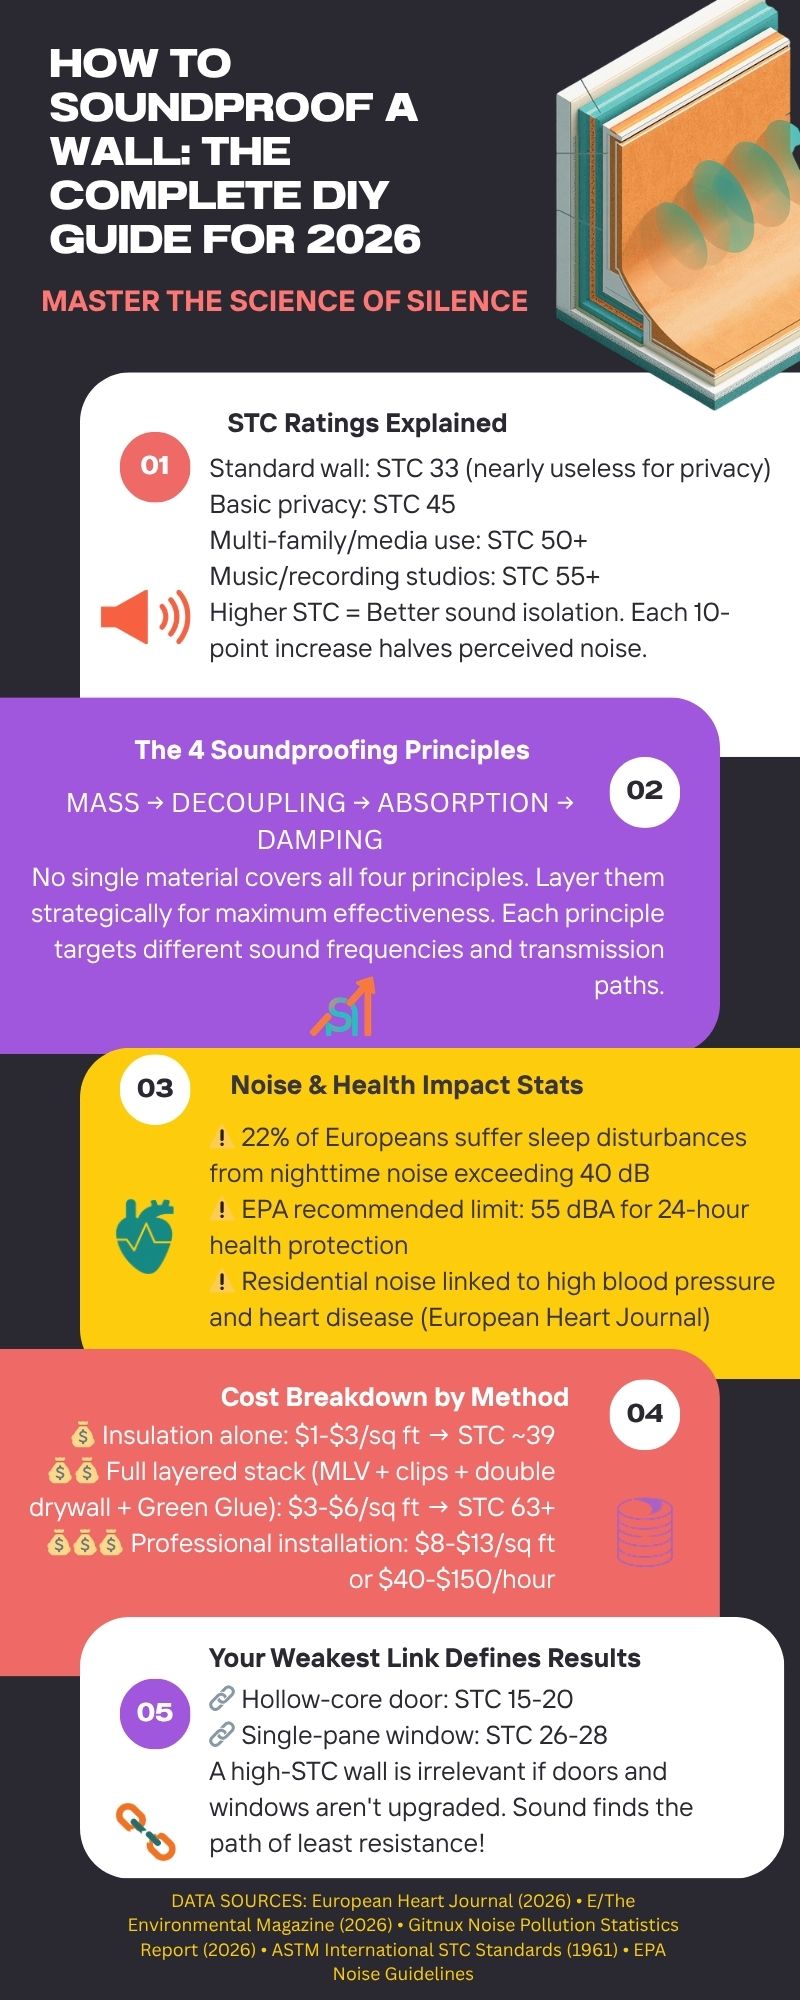
- STC is your north star. Every soundproofing decision should be guided by Sound Transmission Class ratings. A standard wall sits at STC 33 (nearly useless for privacy); you need STC 45 for basic privacy, STC 50+ for multi-family or media use, and STC 55+ for music or recording work.
- Four principles drive all soundproofing: mass, decoupling, absorption, and damping. No single material covers all four — the best results come from layering them together strategically.
- Seal before you spend. Flanking paths through outlets, door gaps, and trim can completely undermine an expensive wall build. Acoustical sealant costs a fraction of drywall or MLV, and sealing first is always the right first step.
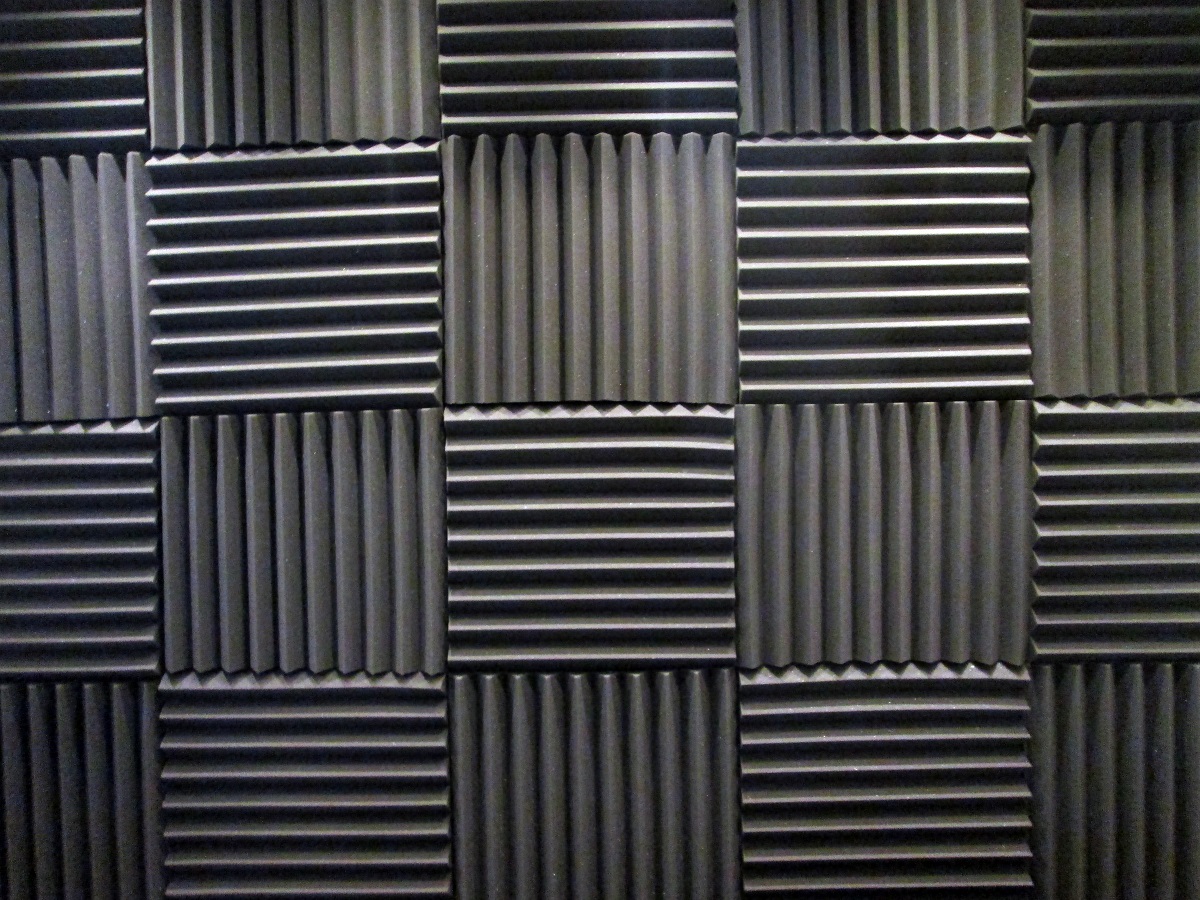
- Acoustic foam does not soundproof a room. It reduces echo inside the room (NRC), but blocks almost no sound transmission through walls (STC). Confusing the two is the most common — and costly — DIY mistake.
- Your weakest link defines your result. A high-STC wall is irrelevant if you have a hollow-core door (STC 15–20) or a single-pane window (STC 26–28) in the same room. Upgrading the door is often the highest-ROI single move you can make.
- Match your method to your budget and noise type. Insulation alone gets you to STC ~39 for $1–$3/sq ft. A full layered stack (MLV + resilient clips + double drywall + Green Glue) can hit STC 63+ but costs $3–$6/sq ft in materials. Most homeowners land in the middle — and that’s perfectly fine for the problem they’re actually solving.
- DIY labor savings are real. Professional soundproofing installation runs $8–$13/sq ft, or $40–$150/hour for a handyman. On a typical room-sized project, doing it yourself can save thousands — and most methods are well within reach for anyone comfortable with basic carpentry.
If you’ve ever tried to work from home while your neighbor’s TV bleeds through the wall, or lost sleep because the street outside sounds like a highway at 2 a.m., you already know that noise is more than annoying. It’s a genuine health problem. According to a 2026 report in E/The Environmental Magazine, research published in the European Heart Journal highlights a strong link between residential noise and cardiovascular issues. The study suggests that consistent exposure to noise at home notably raises the risk of high blood pressure and heart disease, pointing to nighttime disturbances as the most harmful factor.
Furthermore, a 2026 noise pollution statistics report from Gitnux reveals that 22% of Europeans suffer from sleep disturbances due to nighttime noise levels exceeding 40 dB. This highlights a significant health gap, as the EPA’s recommended 24-hour average for total health protection is capped at a strict 55 dBA.
The good news? You don’t need to hire a professional or gut your walls to make a meaningful dent in your noise problem. This guide breaks down exactly how DIY soundproofing works, which methods and materials give you the best return, what everything costs in 2026, and where to go next when you’re ready to start your project.
Let’s get into it.
What Is STC — and Why Does Every DIYer Need to Know It?
Before you buy a single roll of mass-loaded vinyl or a tube of acoustic sealant, you need to understand STC (Sound Transmission Class) — the industry-standard rating that tells you how well a wall, floor, door, or window blocks airborne sound.
STC was introduced in 1961 by ASTM International as a standardized way to compare sound-blocking performance across different building materials. The number is derived by measuring sound attenuation across 16 standard frequencies between 125 Hz and 4,000 Hz and comparing that result to a reference curve. The higher the number, the better the soundproofing. Here’s how the Wikipedia entry on Sound Transmission Class — backed by ASTM E413 and E90 testing standards — breaks down what real-world STC ratings feel like:
| STC Rating | What You’ll Hear Through the Wall |
| 25–30 | Normal speech clearly understood |
| 33 | Standard interior wall (no insulation) — almost no soundproofing |
| 39 | Standard wall + fiberglass insulation — loud speech still audible |
| 45 | Baseline for real privacy; conversations heard but not understood |
| 50 | Required by International Building Code for multi-family construction |
| 55–60 | Excellent — significant reduction even for loud sounds |
| 63+ | Professional studio-grade double stud wall |
(Sources: Acoustical Surfaces STC Guide, New York Soundproofing — STC vs NRC, Mecart — Demystifying STC Ratings)
One important caveat: STC measures mid-to-high frequency sounds like speech well, but is less reliable for low-frequency noise — bass, subwoofers, traffic rumble, and heavy machinery. If your main problem is bass-heavy sound, you’ll need strategies beyond what STC alone can predict. For a deeper breakdown of this limitation, Acoustical Surfaces explains the gap between STC ratings and real-world performance with low frequencies.
Also critical: STC ratings measure components, not finished rooms. A wall with STC 52 is undermined the moment you have a hollow-core door (STC ~15–20) or a single-pane window (STC 26–28) in the same room. Soundproofing is only as strong as its weakest link.
The Four Pillars of Soundproofing
Every effective soundproofing strategy — whether it costs $50 or $5,000 — relies on one or more of these four principles. Understanding them helps you make smarter decisions about what to buy and where to spend.
1. Mass
Heavier, denser materials are harder for sound waves to move through. Adding mass is often the first line of defense. A second layer of drywall, for example, can add 2–5 STC points to an existing wall.
2. Decoupling
Physically separating two surfaces breaks the path that sound vibrations travel through structure. This is why resilient channels and staggered-stud walls work so well: they prevent sound from simply “riding” through rigid connections from one side of the wall to the other.
3. Absorption
Filling cavities with insulation absorbs sound energy and converts it to heat before it can transmit through the wall. Standard fiberglass insulation bumps a basic wall from STC 33 to around STC 39; denser mineral wool (like Rockwool) performs even better.
4. Damping
Damping compounds like Green Glue convert sound energy into heat through viscoelastic friction when applied between two rigid panels. Particularly effective for low-frequency sound.
The best DIY wall treatments layer all four principles together. The more pillars you stack, the higher your STC — and the quieter your space.
DIY Soundproofing Methods Compared: STC Gains vs. Cost
This is where the rubber meets the road. Here’s a comparison of the most common DIY soundproofing methods, ranked from budget-friendly to professional-grade, with current 2026 pricing from HomeGuide’s 2026 room soundproofing cost report and Angi’s 2026 soundproofing guide.
Method 1: Add Fiberglass or Mineral Wool Insulation to Wall Cavity
STC Improvement: +5 to +7 points (STC 33 → ~39)
Material Cost: $1–$3/sq ft
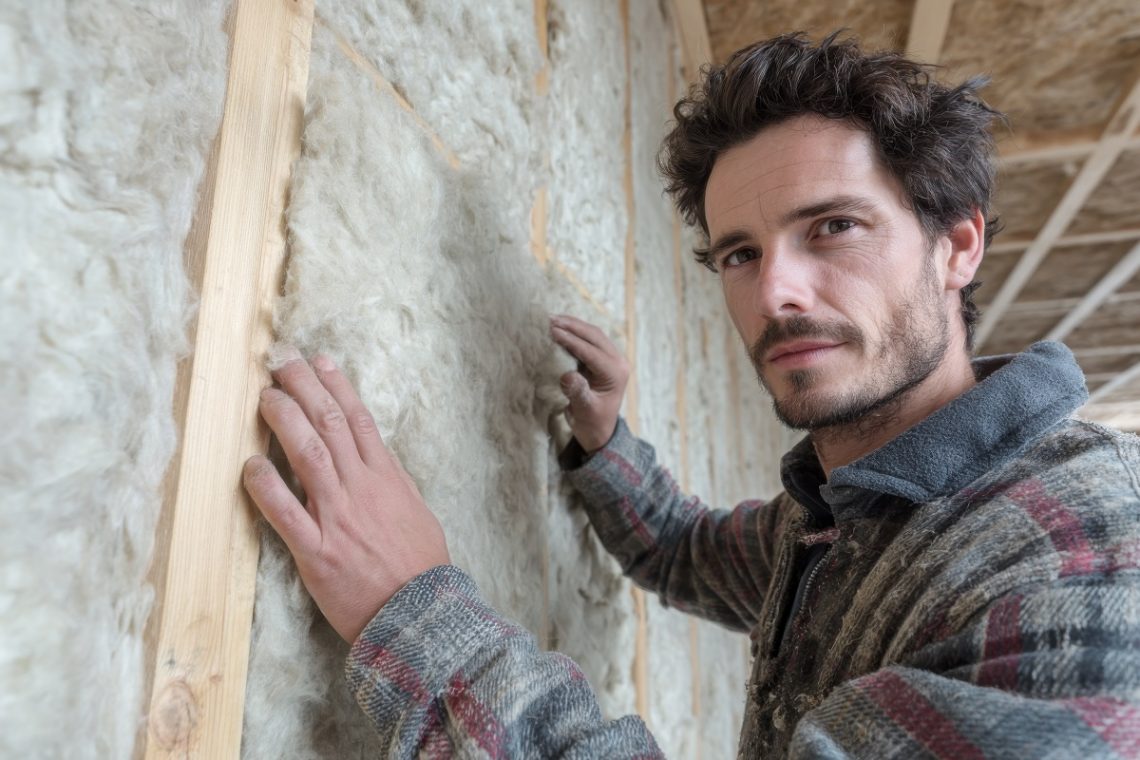
If your walls are currently empty stud cavities — common in older homes — filling them with insulation is the single highest-ROI upgrade you can make. Acoustical Surfaces confirms that adding standard fiberglass insulation bumps a basic wall from STC 33 to around STC 39. Dense-pack mineral wool (like Rockwool Safe’n’Sound) performs slightly better and offers the bonus of fire and moisture resistance.
Foam insulation that can be injected through small holes without removing drywall runs about $1–$3/sq ft, making it a relatively non-invasive upgrade for existing walls (HomeGuide 2026).
Limitation: For batt insulation, you’ll need to open the wall or use a blown-in approach. Best done during a renovation.
Best for: Whole-home renovation, new construction, or when walls are already open.
Method 2: Add a Second Layer of Drywall (With or Without Green Glue)
STC Improvement: +2 to +8 points
Material Cost: $1.50–$3.50/sq ft installed (drywall); add ~$1.04–$1.11/sq ft for Green Glue compound
Adding a second layer of 5/8″ drywall to an existing wall increases mass and adds meaningful STC points. Screwing it directly to the existing drywall adds about 2–3 points. Using Green Glue damping compound between the two layers can push that to 5–8 additional points by adding damping on top of mass — particularly helpful for low-frequency sounds.
Soundproof Your Studio’s cost breakdown pegs standard 5/8″ drywall at roughly $0.56/sq ft in materials, while a 5-gallon pail of Green Glue runs approximately $1.04–$1.11/sq ft at full coverage. For a room where space is not a constraint, some acoustic engineers argue that adding a third layer of plain drywall achieves comparable results at lower cost than a Green Glue treatment. That said, Green Glue does outperform plain drywall for low-frequency damping, which extra layers of gypsum alone can’t fully replicate.
HomeGuide’s 2026 data puts standard drywall installation at $1.50–$3.50/sq ft installed; specialized soundproof drywall (like QuietRock or CertainTeed SilentFX) costs $30–$100 per 4×8 panel.
Best for: Apartments, rental spaces, or anywhere you can’t open the wall cavity.
Method 3: Mass Loaded Vinyl (MLV)
STC Improvement: +5 to +10 points when properly installed
Material Cost: $2.50–$5/sq ft (standard); ~$150 per 40 sq ft roll
Mass Loaded Vinyl is a dense, flexible barrier sheeting typically made from PVC loaded with calcium carbonate or barium sulfate. Unlike foam (which only absorbs sound), MLV acts as a heavy barrier that blocks sound waves from passing through. Commercial Acoustics’ MLV guide notes that when correctly installed — stapled to studs behind drywall with sealed seams — it can raise wall STC ratings by 7–10 points.
The 2026 Angi guide puts standard MLV at around $150 per 40 sq ft roll, or $2.50–$5/sq ft. The heaviest 2 lb/sq ft version runs higher — Soundproof Your Studio calculates it at $3.60/sq ft, roughly six times the cost of basic drywall — so its value proposition depends heavily on how much space you’re working to preserve versus how much you can spend.
MLV is also highly versatile: it can wrap pipes, go beneath flooring, and even be used for automotive applications, according to Soundproof Central’s MLV guide.
Best for: Walls where space is at a premium; supplementary layer under finished flooring; wrapping HVAC ducts and noisy pipes.
Method 4: Resilient Channels or Isolation Clips
STC Improvement: +10 to +15 points; combined systems can exceed STC 50
Material Cost: $150–$200 per wall for channels; $2–$3 per isolation clip
This is where decoupling does its heaviest lifting. Resilient channels are thin metal hat-channels that screw horizontally to studs, so that drywall hangs from the channels rather than the studs directly. This breaks the rigid structural connection that allows sound vibrations to travel right through the wall.
Isolation clips (like RSIC-1 or whisper clips) go a step further — using rubber-isolated mounts that provide even more decoupling than basic channels. The result can push an average wall past STC 50 without changing the wall cavity at all. Rmax’s STC and insulation overview confirms that incorporating resilient channels can push wall ratings above 50.
Fixr’s 2026 pricing data puts resilient channel installation at $150–$200 per wall.
Important: Resilient channel installations fail if a screw accidentally “short circuits” the channel by hitting a stud through the drywall. Careful installation technique is essential — this is one area where watching tutorial videos beforehand really pays off.
Best for: Home offices, bedrooms adjacent to loud spaces, media rooms, or anywhere dealing with significant structural vibration.
Method 5: The Layered Stack — High-Performance Build
STC Achievement: 55–65+
Total Cost: $3–$6/sq ft in materials; $3,000+ for a professionally treated room wall
For serious noise problems — recording studios, home theaters, or shared walls in attached housing — the best results come from layering all four principles:
- Staggered or double stud wall framing (decoupling)
- Dense mineral wool insulation in the cavity (absorption)
- Mass Loaded Vinyl stapled to the studs (mass)
- Resilient clips or channels (decoupling)
- First layer of 5/8″ drywall
- Green Glue damping compound (damping)
- Second layer of 5/8″ drywall
- Acoustical sealant on all edges and penetrations
A double stud wall with this kind of layering can achieve STC ratings of 63 or higher. As Audimute’s STC rating resource explains, at that level most frequencies become inaudible on the other side — making the room effectively 88% quieter than a standard wall.
For total cost context, Sound Pro Solutions’ soundproofing cost guide puts a professionally built MLV + clips + Green Glue wall at around $3,000 for 20–30 dB of noise reduction — which translates to roughly $50–$150 per decibel gained.
STC Gain vs. Cost: A Comparative Summary
| Method | Approx. STC Gain | Material Cost/sq ft (2026) | Best Use Case |
| Fiberglass/foam insulation (empty cavity) | +5–7 | $1.00–$3.00 | Open walls, new construction |
| Extra drywall layer only | +2–3 | $1.50–$3.50 installed | Budget-conscious upgrade |
| Extra drywall + Green Glue | +5–8 | $2.50–$4.50 | Rental-friendly, low-frequency noise |
| Mass Loaded Vinyl | +7–10 | $2.50–$5.00 | Space-constrained walls |
| Resilient channels/clips + drywall | +10–15 | $2.00–$4.00 | Medium-to-high noise problems |
| Full layered stack build | +20–30+ | $3.00–$6.00+ | Studio, theater, shared walls |
(Sources: HomeGuide 2026, Angi 2026, Fixr 2026, Commercial Acoustics, Sound Pro Solutions)
The Mistake Most DIYers Make: Ignoring Flanking Paths
Here’s a hard truth: you can spend thousands of dollars building an STC 55 wall and still have a noisy room if you ignore flanking paths — the routes sound takes around your new wall rather than through it.
Sound is relentless. It travels through:
- Electrical outlets and switch boxes — back-to-back outlets on a shared wall create a direct hole through your insulation. Use acoustical putty pads or stagger them on opposite wall faces.
- Gaps around baseboards, crown molding, and door frames — use acoustical sealant (like OSI SC-175) on every penetration. Fixr’s soundproofing cost guide puts a basic room worth of crack sealants at $100–$350 — one of the cheapest upgrades with outsized impact.
- HVAC ducts and plumbing runs — wrapping pipes with MLV and installing flexible duct connections breaks these transmission paths.
- Windows and doors — a hollow-core interior door has an STC around 15–20. A solid-core MDF door ($250–$800 installed) raises that to STC 32, and is one of the highest-ROI upgrades in a single room. Journeyman HQ’s basement soundproofing comparison highlights that solid-core doors deliver STC 30–35 vs. hollow-core at STC 15–20.
The rule of thumb is simple: seal everything before adding more layers. A wall is only as quiet as its weakest link.
Soundproofing vs. Acoustic Treatment: Know the Difference
This is possibly the most common point of confusion for first-time DIYers — and getting it wrong wastes money.
Soundproofing (what this guide covers) reduces how much sound passes through walls — measured by STC. It’s about blocking noise between rooms or from outside.
Acoustic treatment improves sound within a room — reducing echo, flutter echo, and reverberation. Foam panels, acoustic tiles, and diffusers are acoustic treatment, measured by NRC (Noise Reduction Coefficient). New York Soundproofing’s breakdown of STC vs. NRC is a useful primer on the distinction.
Common foam panels have almost zero soundproofing value. They will not prevent sound from leaving or entering a room. They make recordings sound better by reducing echo inside the room — a completely different problem. If you’re seeing social media tutorials featuring foam panels stapled to a wall as a “soundproofing” solution, those creators are conflating the two concepts.
The best approach for most home studios, podcast rooms, and home offices is a combination: soundproofing materials in the wall assembly to block transmission, paired with acoustic panels inside the room to manage reflections and improve audio quality.
Room Type Quick-Reference: What’s Right for Your Project?
Home Office or Podcast Room
Goal: Block voice and keyboard noise; prevent outside distraction.
Recommended approach: Add a second drywall layer + Green Glue to shared walls. Solid-core door with perimeter seals. Acoustical sealant on all penetrations.
Estimated DIY budget: $500–$2,500 (HomeGuide 2026)
Bedroom (Noise from a Neighbor or Street)
Goal: STC 45–50 for sleep-worthy quiet.
Recommended approach: Resilient channels + mineral wool insulation + two drywall layers on shared or exterior walls. Acoustical window inserts if street noise is the primary source (single-pane windows have STC just 26–28).
Estimated DIY budget: $1,500–$4,000
Home Theater or Music Room
Goal: STC 55+ to prevent bleed-through; keep the bass contained.
Recommended approach: Full layered stack — staggered studs, MLV, Green Glue, double drywall. Floating floor system for impact isolation. Solid acoustic door assembly.
Estimated DIY budget: $5,000–$12,000+ depending on room size (Sound Pro Solutions)
Apartment or Rental
Goal: Non-invasive solutions that don’t require wall demolition or landlord approval.
Recommended approach: Heavy bookshelves or furniture against shared walls as mass; acoustic curtains over windows; door sweeps and draft stoppers; temporary MLV panels hung on walls.
Estimated budget: $100–$800
Budget Planning: What Does DIY Soundproofing Really Cost in 2026?
According to HomeGuide’s 2026 soundproofing cost report, the national average for room soundproofing sits at $1,400 to $4,300 total, or $10–$30 per square foot with professional installation. DIY materials-only costs are significantly lower.
Here’s how it breaks down by room size:
Small room (home office, nursery, guest bedroom): $1,000–$2,500 for solid wall treatment, door sealing, and basic window work. At this scale, DIY-friendly options like Green Glue, acoustic panels, and door seal kits do most of the heavy lifting.
Medium room (primary bedroom, living room, small studio): $2,500–$5,500 depending on material choices. This is where mass-loaded vinyl starts to make economic sense. Sound Pro Solutions notes that mid-size rooms benefit most from combining acoustic drywall with door sealing.
Large room (open basement, home theater, dedicated recording studio): $6,000–$12,000 or more when treated comprehensively. Labor becomes a significant portion of the budget. Angi’s 2026 pricing data reflects professional labor at $8–$13/sq ft for soundproofing specialists, or $40–$150/hour for handymen.
A few money-saving principles regardless of room size:
- Don’t over-engineer for your actual noise source. An STC 60 wall is overkill if your complaint is a neighbor’s TV. STC 45–50 handles most residential situations.
- Prioritize the weakest link first. Spending $300 on a solid-core door and proper seals often delivers more real-world quiet than $800 on extra drywall layers.
- Buy materials in bulk. Green Glue, MLV, and Rockwool all have significantly lower per-unit costs at larger quantities.
- DIY the labor. According to Second Skin Audio’s wall cost guide, handyman labor runs $40–$150/hour depending on location. On a 200 sq ft wall project, that’s a meaningful saving if you can handle the installation yourself.
Quick-Start Action Plan
If you’re not sure where to begin, work through this sequence:
- Identify your noise type. Airborne (speech, TV, music) or impact (footsteps, vibration)? Different problems call for different solutions.
- Find your weakest link. Walk around the room and listen carefully. Doors, outlets, windows, and trim gaps are the usual suspects.
- Seal before you add mass. Acoustical sealant is cheap. Fill every gap, crack, and penetration before spending money on drywall or MLV.
- Choose your STC target. STC 45 for casual privacy. STC 50+ for multi-family or media use. STC 55+ for music or recording work.
- Layer your solution. Start with insulation, add mass, add decoupling where budget allows, then finish with damping compound between layers.
- Don’t forget the interior acoustics. Once your walls are treated, add acoustic panels inside the room to address echo and reverberation — that’s where foam and fabric panels earn their keep.
Frequently Asked Questions
Does acoustic foam soundproof a room?
No. Acoustic foam reduces echo and reverberation inside a room (NRC), but has almost no ability to block sound transmission through walls (STC). For soundproofing, you need mass, decoupling, and damping. New York Soundproofing explains the difference in detail.
Can I add STC ratings together?
No — STC is logarithmic, not additive. Adding a wall with STC 40 and a panel with STC 20 doesn’t give you STC 60; the combined result is closer to STC 45. Audimute’s STC explainer breaks down the math.
What’s the minimum STC for a home recording setup?
STC 45 prevents conversations from being intelligible through the wall — often sufficient for podcasting or voiceover work. For music recording where bleed is a concern, aim for STC 55+.
Does soundproofing add home value?
Finished basement studios, quiet home offices, and dedicated media rooms appear frequently as premium features in real estate listings. While hard ROI data varies by market, the addition is generally viewed positively by buyers — particularly in urban areas where noise is a known quality-of-life issue.
What’s the International Building Code requirement for multi-family walls?
The IBC requires a minimum STC of 50 for walls and floor/ceiling assemblies separating dwelling units, as Acoustical Surfaces notes. Many older buildings fall short of this — which is why so many apartment dwellers find themselves Googling “how to soundproof a wall” at midnight.
Ready to Start Your Project?
Soundproofing a wall is one of the highest-impact home improvement projects you can take on — not just for comfort, but for sleep, productivity, and long-term health. The research is increasingly clear on the damage that chronic noise exposure does; the practical upside is that the solutions are measurable, learnable, and well within reach for a motivated DIYer.
The key is matching your method to your problem, sealing before you layer, and understanding that no single material is a magic bullet. Start with the weakest link. Layer systematically. Test as you go.