

Embarking on a comprehensive home transformation is an exciting venture that enhances comfort, elevates property value, and modernizes living spaces. However, executing a seamless residential renovation requires far more than aesthetic vision; it demands a strategically organized timeline that sequences trades, manages materials, and protects structural integrity. Navigating structural alterations, interior finishes, and exterior grounds without a clear roadmap can lead to miscommunicated plans and costly delays. A phase-by-phase approach brings structure to complex builds, ensuring every contractor operates under optimal conditions.
Phase 1: Discovery, Budgeting, and Professional Design

Major residential renovations require a structured schedule to keep costs under control, ensure quality craftsmanship, and prevent unnecessary delays. Homeowners who begin a large construction project often feel overwhelmed by the sheer volume of choices, tradespeople, and technical steps involved. Establishing a realistic, phase-by-phase timeline creates clarity from day one. By understanding how each stage builds upon the previous one, homeowners can manage expectations, budget effectively, and communicate clearly with their construction team.
The first phase of any home renovation centers on preparation, conceptual design, and financial planning. Months before a single sledgehammer swings, property owners must define their goals and establish a firm financial baseline. This stage typically spans two to three months, depending on the complexity of the project and local permitting requirements. During this period, homeowners research architectural styles, gather design inspiration, and list essential functional upgrades. Financial planning requires allocating a contingency fund of fifteen to twenty percent above the estimated budget to accommodate unforeseen structural or electrical repairs discovered during teardown.
Collaborating with experienced trade professionals early in the process prevents costly mistakes later on. For instance, engaging a dedicated kitchen remodeling service early in the planning stage ensures that appliance dimensions, plumbing layouts, and electrical capacity align with structural realities. Specialized contractors help translate broad ideas into actionable floor plans, taking into account load-bearing walls and utility locations. Simultaneously, addressing high-use spaces demands careful thought. Planning a comprehensive bathroom remodeling project requires early decisions on moisture barriers, ventilation capacity, and tile weights to ensure structural suitability and longevity.
Securing building permits represents another major hurdle during the initial phase. Local municipal offices often require detailed blueprints and architectural stamps before granting approval for structural, electrical, or plumbing alterations. Depending on local bureaucracy, permitting can take anywhere from two weeks to two months. Ordering long-lead items, such as custom fixtures, windows, and structural beams, should also happen during this window to ensure materials arrive before construction crews hit the job site.
Phase 2: Demolition, Framing, and Exterior Envelope Preparation

Once permits are secured and materials are ordered, physical work begins on-site with demolition and structural framing. This phase generally lasts between two and four weeks, depending on the scale of the teardown. Demolition involves removing old fixtures, wall coverings, flooring, and non-load-bearing walls. Safety remains the top priority during this stage. Crews must verify that electricity, gas, and water lines are shut off before tearing down structures, while testing for hazardous materials like asbestos or lead paint in older homes.
Following demolition, structural alterations take center stage. Carpenters build framing for new room layouts, reinforce load-bearing headers, and construct framing for additions or bumped-out windows. Structural modifications must be thoroughly inspected by municipal building officials before workers close up walls. Any errors in wall alignment or subfloor framing will cause significant issues during tile or cabinet installation later, making accuracy in this phase critical to overall success.
While internal framing takes shape, protecting the building envelope against the weather becomes essential. Replacing damaged roof decking, installing weather barrier wraps, and updating external trim prevent rain or moisture from seeping into raw interior lumber. During exterior updates, hiring certified gutter installers to fit continuous drainage channels prevents rainwater from collecting near raw foundation footings or dripping onto newly framed walls. Proper drainage keeps the entire structure dry while crews focus on interior mechanical systems.
Waste management also demands careful attention throughout demolition and framing. Contractors must arrange for site roll-off dumpsters and daily debris removal to maintain a safe working environment. Keeping a clean job site reduces trip hazards, prevents nail punctures, and allows delivery drivers to drop off structural lumber and sheeting without obstruction. Orderly job sites also help prevent accidental damage to existing home elements that are meant to be preserved.
Phase 3: Behind-the-Walls Infrastructure and Subflooring
With the structural framework securely in place, the project shifts toward mechanical, electrical, and plumbing rough-ins. Commonly referred to as the rough-in stage, this phase typically takes three to four weeks. During this period, tradespeople run piping, ductwork, and wiring throughout the frame before any drywall covers the studs.
Plumbers install supply lines, drain lines, and vent stacks for sinks, showers, and toilets. Electricians run wiring harnesses, set junction boxes for lighting fixtures and outlets, and set up main panel upgrades if the home requires higher electrical capacity. HVAC technicians install ductwork, air returns, and exhaust channels to guarantee proper airflow and temperature regulation throughout the renovated areas.
Once utility lines are positioned, formal rough-in inspections take place. Municipal inspectors examine electrical panel wiring, plumbing pressure levels, and structural clearance around ductwork. Passing these inspections is mandatory before insulating walls or sealing surfaces. Any failed inspection requires quick adjustments and a follow-up review, which can pause the overall schedule by several days.
After passing mechanical inspections, insulation crews install fiberglass batts, spray foam, or mineral wool into wall cavities and ceiling joists to optimize thermal efficiency and soundproofing. Wallboard installation follows, taking roughly two weeks. Workers hang drywall sheets, apply joint compound, and perform multiple rounds of sanding to achieve smooth, continuous surfaces.
Subfloor preparation occurs alongside drywall finishing. Ensuring that subfloors are level, dry, and structurally sound sets the stage for surface finishes. Proper leveling prevents future squeaks, dips, or gaps when homeowners schedule a professional hardwood floor installation in living rooms or bedrooms. Addressing floor flatness at this junction eliminates common installation issues down the line and protects delicate floor planks from premature wear.
Phase 4: Interior Carpentry, Cabinetry, and Countertops
As interior rooms transition from dusty construction zones to refined spaces, finish carpentry takes center stage. This phase transforms open spaces into functional living areas through detailed woodwork, cabinetry, and solid surface installations. Lasting between three and five weeks, phase four requires high precision and close coordination among trade specialists.
Interior door frames, window trim, baseboards, and crown molding are installed first. Finish carpenters ensure clean miter joints and tight fits against drywalled surfaces. Following trim work, storage systems and millwork are delivered to the property. Installing custom cabinets requires meticulous leveling and anchoring to wall studs, as uneven installation can lead to binding drawers, misaligned doors, and structural stress on adjoining surfaces.
Once cabinetry is fully secured, precision measuring for solid surfaces begins. Technicians visit the site to create digital templates of cabinet tops, accounting for wall irregularities, sink cutouts, and faucet placements. Fabricators use these exact measurements to cut, edge, and polish stone or quartz slabs in off-site workshops over one to two weeks.
The delivery and fitting of each countertop surface requires specialized lifting equipment and experienced installers to avoid cracking or damaging adjacent cabinetry. After countertops are glued and seam, plumbers return to hook up undermount sinks, faucets, garbage disposals, and dishwashers. Simultaneously, tile setters begin installing backsplashes, shower walls, and floor tiles, applying waterproof membranes beneath wet zones to ensure longevity.
Detailing work during this phase includes mounting interior door hardware, setting decorative wall paneling, and assembling built-in shelving units. Having precise millwork in place provides a clean structure for the finishing trades that follow immediately in the next phase of construction.
Phase 5: Surface Prep, Wall Finishes, and Fixtures
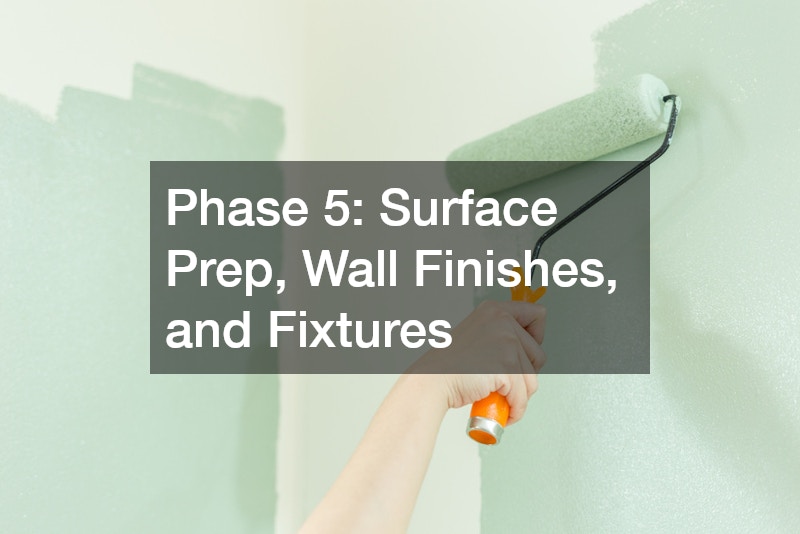
With heavy carpentry and structural surfaces completed, the project enters the finish stage, where visual aesthetic and atmospheric details come together. Phase five usually spans two to three weeks and focuses on wall coatings, electrical trim, and fine detailing across all renovated rooms.
Surface preparation remains the key to an enduring paint job. Dust from drywall sanding and construction debris must be thoroughly vacuumed and wiped from walls, trim, and ceilings. Hiring a skilled painter ensures that raw drywall receives high-grade primer before topcoats are applied, preventing uneven sheen or peeling. Professional surface prep includes patching minor nail holes, caulking baseboard seams, and applying sharp tape lines for clean color transitions between walls and ceiling trim.
Once primary wall coatings dry, electricians install decorative lighting fixtures, chandelier assemblies, wall sconces, outlet covers, and dimmer switches. Plumbers return for final trim work, mounting shower heads, glass enclosure hardware, towel bars, and vanity faucets. HVAC technicians set final register grilles and configure smart thermostats to calibrate the home climate system.
Detailing work during this phase also includes mounting cabinet hardware, such as handles, knobs, and soft-close hinges. Careful measurement prevents crooked pulls on fresh cabinet doors. Specialty glass installers fit custom shower doors, mirrors, and glass shelving. Every room undergoes careful visual review to identify scratches, paint overspray, or missing hardware before final walkthroughs.
Proper ventilation during painting and finishing ensures low odor levels and proper drying times for paints, varnishes, and sealants. Taking time during this step avoids smudges on freshly finished woodwork and guarantees a uniform finish across every room.
Phase 6: Exterior Integration and Landscape Design

A complete home renovation often extends past exterior walls into surrounding yards, walkways, and patio areas. Construction activities frequently disrupt surrounding turf, soil compaction, and garden beds due to heavy machinery, dumpster placement, and foot traffic. Phase six focuses on restoring and refining exterior spaces, taking roughly two to three weeks.
Integrating indoor living with exterior surroundings requires thoughtful planning. Homeowners benefit from consulting an expert landscape designer to create structured outdoor layouts, including paver patios, retaining walls, native plant gardens, and outdoor lighting schemes. Aligning outdoor living spaces with indoor sightlines creates a harmonious flow from back doors onto outdoor entertaining decks or gardens.
Heavy outdoor construction, such as pouring concrete patios, laying flagstone walkways, or building outdoor kitchens, takes place first. Subsurface drainage pipes, irrigation lines, and low-voltage electrical conduits are buried before soil preparation begins. Grading the perimeter away from the foundation ensures proper water runoff, protecting new indoor renovations from water intrusion during heavy rainfall events.
Once hardscaping and grading conclude, planting trees, shrubs, and laying fresh turf revitalizes the property landscape. Setting up a structured schedule for ongoing landscape maintenance ensures that newly planted trees, flowering shrubs, and fresh sod establish healthy root systems and thrive throughout changing seasonal conditions. Clean edges, fresh mulch, and healthy greenery frame the newly renovated home beautifully.
Outdoor lighting installation finishes off the exterior phase, illuminating walkways, architectural features, and garden beds. Proper exterior illumination adds security while enhancing nighttime curb appeal for visitors and residents alike.
Phase 7: Final Inspections, Cleaning, and Move-In
The closing phase of a residential renovation transitions the project from a live construction site back into a clean, functioning home. Spanning one to two weeks, phase seven involves rigorous regulatory inspections, systematic cleaning, and organized move-in logistics.
Final building inspections are scheduled with local municipal officials to sign off on building, plumbing, electrical, and mechanical permits. Inspectors verify that fire alarms, smoke detectors, handrails, and electrical outlets meet current building codes. Securing a formal certificate of occupancy or final signed permit report confirms that the renovated structure is fully safe for residence.
Following official sign-offs, specialized construction cleaning crews perform deep post-renovation cleaning. Construction dust settles into HVAC vents, window tracks, drawer slides, and light fixtures. Professional cleaners wipe down every interior surface, scrub windows inside and out, sanitize bath fixtures, and deep-clean flooring surfaces to remove stubborn dust, plaster residue, and adhesive marks.
Once the interior environment is immaculate, logistics for repopulating the space begin. Contracting an experienced local mover simplifies transitioning stored furniture, appliances, and personal belongings back into the finished spaces without scratching fresh paint or gouging hardwood floors. Moving crews trained in protecting finished surfaces use floor runners and corner guards during unloading.
With furniture in place, homeowners perform a final punch list walkthrough with the general contractor. Every door, switch, drawer, and valve is tested. Minor touch-ups or adjustments are documented and corrected promptly, officially concluding the renovation journey.
A completed renovation yields a refreshed, functional living space built to withstand daily family life for decades to come. Careful adherence to a structured timeline minimizes stress, keeps spending aligned with plans, and turns complex construction goals into a rewarding reality.